pacemaker和Corosync配置实例
pacemaker和Corosync配置实例
pacemaker和Corosync的基础集群搭建可参考https://www.situgou.top/
查看当前集群状态
1 | |
当前集群共有两个节点,分别是node1和node2,并且设置了一个vip,在node1上面。
配置集群web资源:
web资源集群配置这里使用nginx的web服务器来进行配置
在node1上面执行命令,创建一个名为 Nginx 的集群资源。该资源将由集群软件统一管理,实现 Nginx 服务的自动启动、停止、故障监控及故障转移。
1 | |
| 命令片段 | 含义说明 |
|---|---|
pcs |
Pacemaker Configuration System 的命令行工具,用于配置和管理集群。 |
resource create |
子命令,指示 PCS 创建一个新的集群资源。 |
Nginx |
资源 ID。这是在集群内部用来标识该资源的唯一名称,后续操作(如移动、禁用)都将使用此名称。 |
ocf:heartbeat:nginx |
资源代理(Resource Agent)。指定用于管理该服务的脚本标准。 - ocf: 遵循 Open Cluster Framework 标准。 - heartbeat: 命名空间。 - nginx: 具体的代理脚本名称,用于控制 Nginx 进程。 |
configfile=/etc/nginx/nginx.conf |
资源参数。传递给资源代理的具体配置项。此处指定 Nginx 启动时使用的配置文件路径。 |
op monitor interval=30s |
操作定义。定义集群对该资源执行的健康检查操作。 - op: 定义一个操作。 - monitor: 操作类型为监控。 - interval=30s: 每隔 30 秒执行一次健康检查。如果检查失败,集群将尝试恢复或迁移资源。 |
查看创建的集群资源信息
1 | |
查看集群的整体状态,包括节点信息和资源分布
1 | |
使用pcs status可以看到集群的整体状态,这里有一个问题,就是我们的vip是在node1节点上,但是nginx是在node2节点上,当我们访问vip的时候,实际还是访问的node1节点上面的nginx,会导致访问vip时是失败的。
创建web集群资源组
当前出现上面情况的时候,就需要我们创建一个资源组,将vip和nginx这两台资源绑定到一个分组里面,其中的一个资源切换之后,另一个资源也会随着迁移。
为防止裂脑将VIP和WEB resource捆绑到这个group中,使之作为一个整体在集群中切换。
1 | |
创建完成之后再使用pcs status查看集群状态
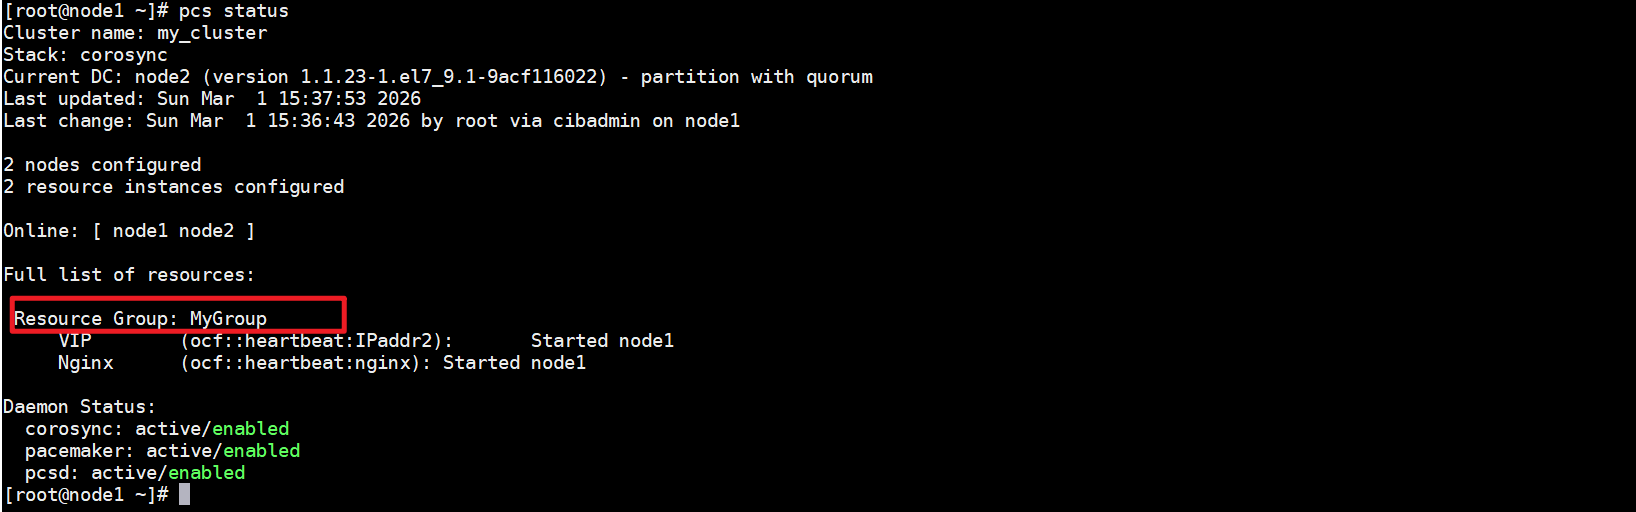
可以看到这里就多了一个资源组,并且该组里面的vip和nginx资源都是在同一节点上运行的。
测试
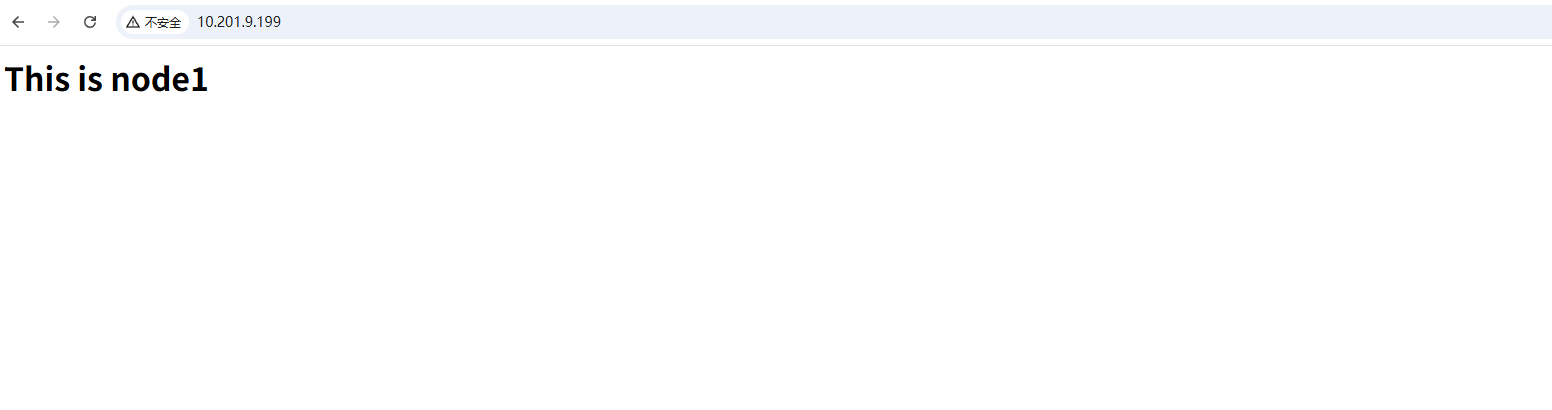
设置一下nginx默认访问页面的
node1
1 | |
node2
1 | |
因为当前的vip是在node1节点上运行的,所以当我们访问vip的时候,页面展示的也是node1节点上nginx的页面
测试迁移效果
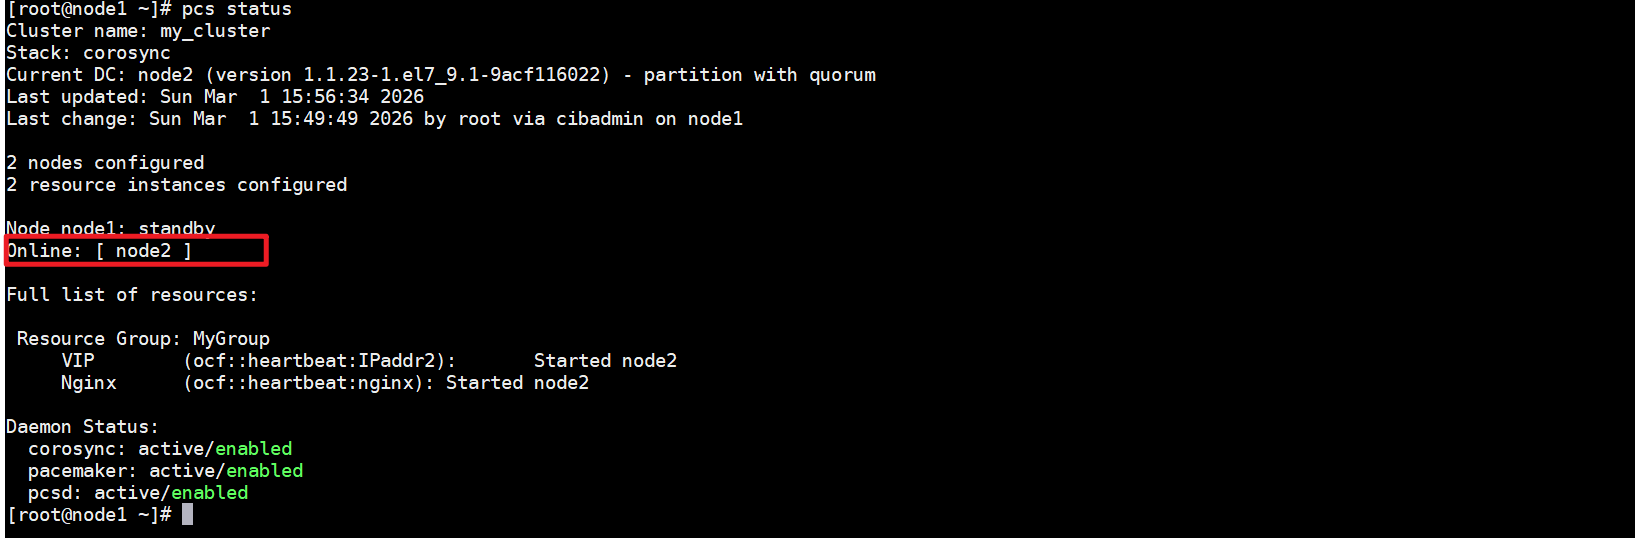
把一个node1节点设置为standby模式并观察集群把所有资源移动到另外一个节点了。并且注意节点的状态改变为不能运行任何的资源。
1 | |
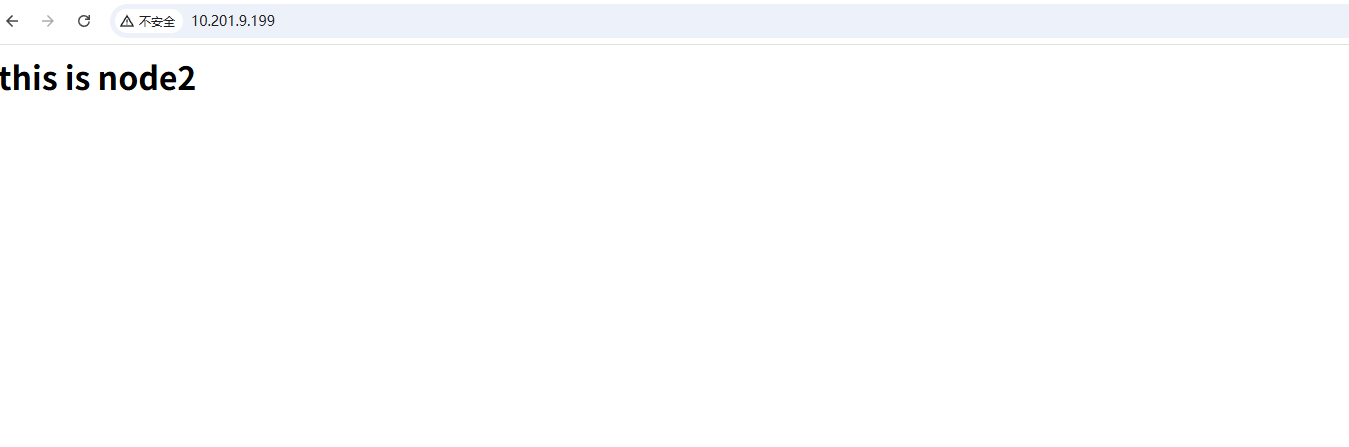
将node1设置成备用状态之后,可以看到vip和nginx的资源都转移到了node2节点上了。
1 | |
此时再使用vip访问的话,页面展示的就是node2节点上显示的内容了。
资源回迁
在node1上设置成standby 之后,我们发现目前的集群状态在线的就只有node2了
现在需要将资源全部迁移回值node1节点上,并将他们都启用,不呈现待机状态,使用pcs node unstandby即可
node1
1 | |
设置集群资源常用命令
设置集群资源约束值:这里指定约束值越大,代表越想在对应的节点上运行
例:pcs constraint location MyGroup prefers node1=50例:pcs constraint location MyGroup prefers node2=45显示分值
例:crm_simulate -sL在资源组中删除资源:在资源组中删除某个资源只需吧add换成delete即可重新添加。
例:pcs resource group delete MyGroup WEB删除集群资源
例:pcs resource delete WEB或pcs resource disable resource_id
集群存储资源定义
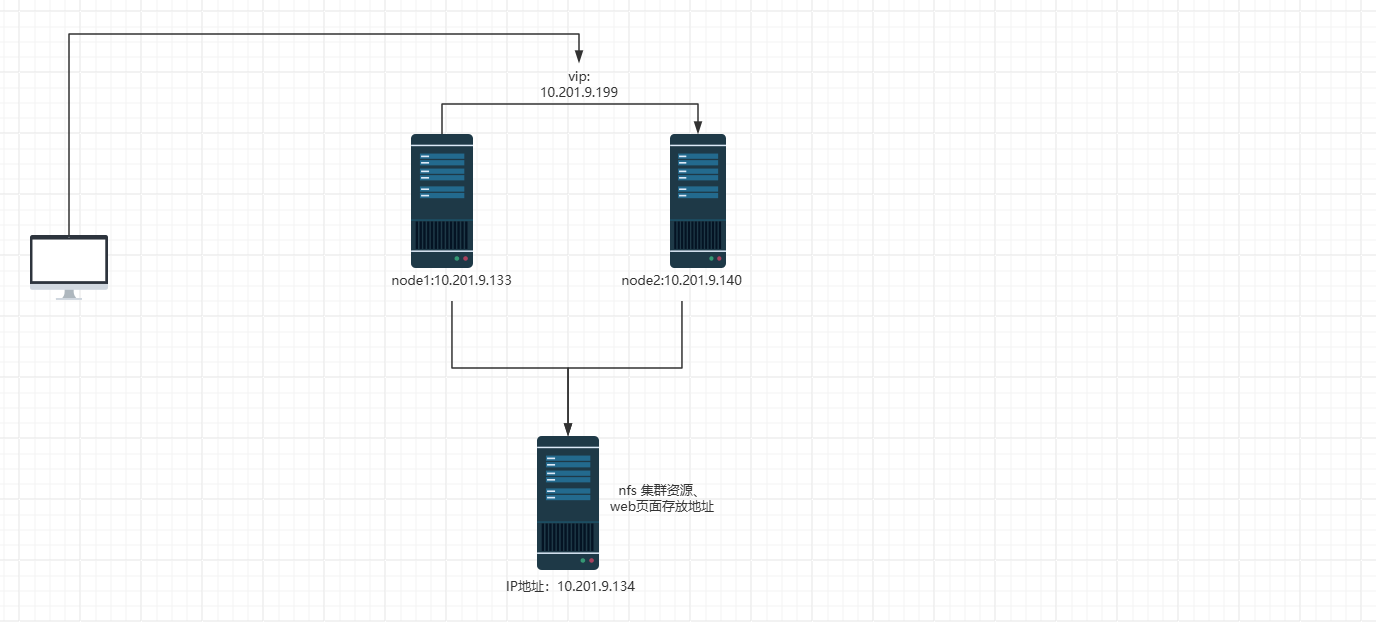
如上图所示:现有两个node节点,做成了pacemaker集群,并将vip和nginx都交给了pacemaker进行管理可以实现自动故障切换。
需求:在搭建一个服务器配置nfs并提供node1和node2节点上nginx的静态页面。实现故障切换的时候,node1节点上和node2节点上的nfs挂载能自动切换 。当node1节点故障的时候就将挂载切换至node2。
配置nfs服务器
1、查看服务器是否已经安装nfs相关包软件,当前系统已经安装nfs-utils,如果没有安装的话可以使用yum进行安装
1 | |
2、修改nfs目录
1 | |
3、启动nfs-server服务
1 | |
4、在node1节点上测试,是否能正常挂载
1 | |
配置Pacemaker挂载
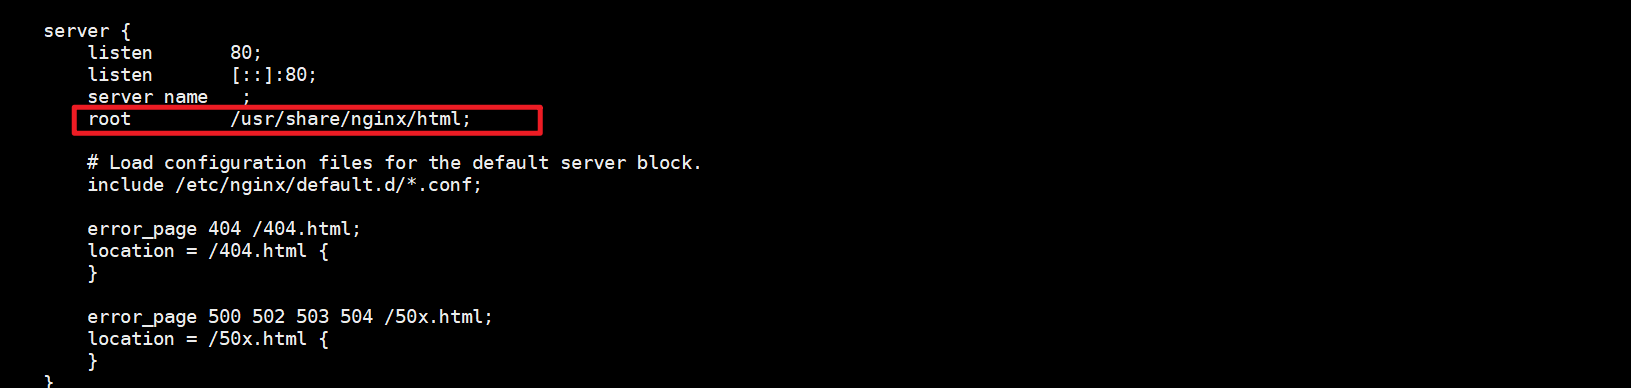
查看nginx的静态页面存放目录
先检查当前系统的nginx静态页面存放目录。可通过nginx的配置文件查看,当前系统的nginx只有一个80端口提供服务,静态存放页面为
共享存储资源配置
1
2
3
4
5
6
7
8
9
10
11
12
13
14
15
16
17
18
19
20
21
22
23
24[root@node1 /]# pcs resource create STORAGE ocf:heartbeat:Filesystem device="10.201.9.134:/storage" directory="/usr/share/nginx/html" fstype="nfs" op monitor interval=20s timeout=40s op start timeout=60s op stop timeout=60s
[root@node1 /]# pcs status
Cluster name: my_cluster
Stack: corosync
Current DC: node2 (version 1.1.23-1.el7_9.1-9acf116022) - partition with quorum
Last updated: Sun Mar 1 18:11:58 2026
Last change: Sun Mar 1 18:11:39 2026 by root via cibadmin on node1
2 nodes configured
3 resource instances configured
Online: [ node1 node2 ]
Full list of resources:
Resource Group: MyGroup
VIP (ocf::heartbeat:IPaddr2): Started node1
Nginx (ocf::heartbeat:nginx): Started node1
STORAGE (ocf::heartbeat:Filesystem): Started node2
Daemon Status:
corosync: active/enabled
pacemaker: active/enabled
pcsd: active/enabled配置完成之后可以看到STORAGE已经配置完成,但是该资源是启动在node节点2上的,这是因为STORAGE没有添加到MyGroup资源组中。所以现在需要将STORAGE添加到资源组中。
将STORAGE添加至资源组
添加完成之后,使用
df -h可以看到nfs已经正常挂载1
2
3
4
5
6
7
8
9
10
11
12
13
14
15
16
17
18
19
20
21
22
23
24
25
26
27
28
29
30
31
32
33
34[root@node1 /]# pcs status
Cluster name: my_cluster
Stack: corosync
Current DC: node2 (version 1.1.23-1.el7_9.1-9acf116022) - partition with quorum
Last updated: Sun Mar 1 18:17:38 2026
Last change: Sun Mar 1 18:17:35 2026 by root via cibadmin on node1
2 nodes configured
3 resource instances configured
Online: [ node1 node2 ]
Full list of resources:
Resource Group: MyGroup
VIP (ocf::heartbeat:IPaddr2): Started node1
Nginx (ocf::heartbeat:nginx): Started node1
STORAGE (ocf::heartbeat:Filesystem): Started node1
Daemon Status:
corosync: active/enabled
pacemaker: active/enabled
pcsd: active/enabled
[root@node1 /]# df -h
文件系统 容量 已用 可用 已用% 挂载点
/dev/mapper/centos-root 37G 29G 8.6G 77% /
devtmpfs 2.4G 0 2.4G 0% /dev
tmpfs 2.4G 39M 2.4G 2% /dev/shm
tmpfs 2.4G 12M 2.4G 1% /run
tmpfs 2.4G 0 2.4G 0% /sys/fs/cgroup
/dev/sda1 1014M 130M 885M 13% /boot
overlay 37G 29G 8.6G 77% /var/lib/docker/overlay2/009d7e68091342e151c35c507dccd08097b6c8264c59ffdf5e9b7713a202c2a5/merged
tmpfs 487M 0 487M 0% /run/user/0
10.201.9.134:/storage 57G 53G 4.7G 92% /usr/share/nginx/html添加nginx测试页
因为node1和node2节点的静态页面是挂载的nfs的共享存储,所以nginx的静态测试页,需要添加到10.201.9.134的/storage共享目录中
1
2
3
4
5
6
7
8
9
10
11
12[root@centos-manager /]# cat /storage/index.html
<!DOCTYPE html>
<html>
<head>
<meta charset="UTF-8">
<title>测试nfs共享存储</title>
</head>
<body>
<p> <h1> <big>这里是共享存储nfs 10.201.9.134</big></h1> </p>
</body>
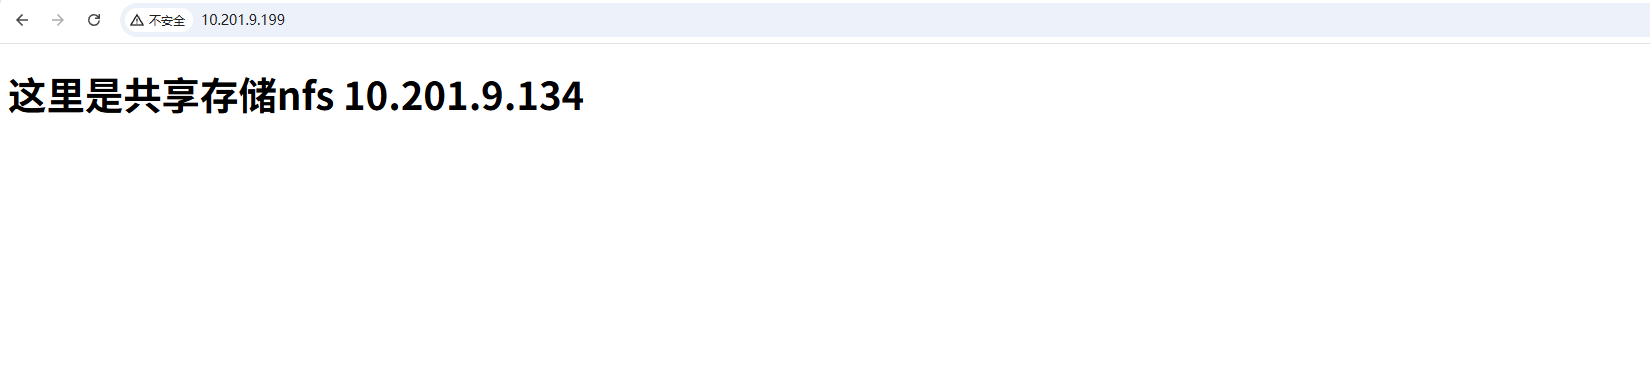
</html>测试
使用vip进行访问,页面可以正常显示
测试故障迁移
将node1节点配置为standby,检查页面是还能正常访问以及挂载的共享存储是否能够切换到node2节点
node1
1
2
3
4
5
6
7
8
9
10
11
12
13
14
15
16
17
18
19
20
21
22
23
24
25
26
27
28
29
30
31
32
33
34
35[root@node1 ~]# pcs node standby
[root@node1 ~]# pcs status
Cluster name: my_cluster
Stack: corosync
Current DC: node2 (version 1.1.23-1.el7_9.1-9acf116022) - partition with quorum
Last updated: Sun Mar 1 18:30:45 2026
Last change: Sun Mar 1 18:30:21 2026 by root via cibadmin on node1
2 nodes configured
3 resource instances configured
Node node1: standby
Online: [ node2 ]
Full list of resources:
Resource Group: MyGroup
VIP (ocf::heartbeat:IPaddr2): Started node2
Nginx (ocf::heartbeat:nginx): Started node2
STORAGE (ocf::heartbeat:Filesystem): Started node2
Daemon Status:
corosync: active/enabled
pacemaker: active/enabled
pcsd: active/enabled
[root@node1 ~]# df -h
文件系统 容量 已用 可用 已用% 挂载点
/dev/mapper/centos-root 37G 29G 8.6G 77% /
devtmpfs 2.4G 0 2.4G 0% /dev
tmpfs 2.4G 39M 2.4G 2% /dev/shm
tmpfs 2.4G 12M 2.4G 1% /run
tmpfs 2.4G 0 2.4G 0% /sys/fs/cgroup
/dev/sda1 1014M 130M 885M 13% /boot
overlay 37G 29G 8.6G 77% /var/lib/docker/overlay2/009d7e68091342e151c35c507dccd08097b6c8264c59ffdf5e9b7713a202c2a5/merged
tmpfs 487M 0 487M 0% /run/user/0node2
1
2
3
4
5
6
7
8
9
10
11
12
13
14
15
16
17
18
19
20
21
22
23
24
25
26
27
28
29
30
31
32
33
34
35
36[root@node2 ~]# pcs status
Cluster name: my_cluster
Stack: corosync
Current DC: node2 (version 1.1.23-1.el7_9.1-9acf116022) - partition with quorum
Last updated: Sun Mar 1 18:31:18 2026
Last change: Sun Mar 1 18:30:23 2026 by root via cibadmin on node1
2 nodes configured
3 resource instances configured
Node node1: standby
Online: [ node2 ]
Full list of resources:
Resource Group: MyGroup
VIP (ocf::heartbeat:IPaddr2): Started node2
Nginx (ocf::heartbeat:nginx): Started node2
STORAGE (ocf::heartbeat:Filesystem): Started node2
Daemon Status:
corosync: active/enabled
pacemaker: active/enabled
pcsd: active/enabled
[root@node2 ~]# df -h
文件系统 容量 已用 可用 已用% 挂载点
/dev/mapper/centos-root 37G 28G 9.2G 76% /
devtmpfs 1.8G 0 1.8G 0% /dev
tmpfs 1.8G 54M 1.8G 3% /dev/shm
tmpfs 1.8G 20M 1.8G 2% /run
tmpfs 1.8G 0 1.8G 0% /sys/fs/cgroup
/dev/sda1 1014M 130M 885M 13% /boot
tmpfs 367M 0 367M 0% /run/user/0
overlay 37G 28G 9.2G 76% /var/lib/docker/overlay2/009d7e68091342e151c35c507dccd08097b6c8264c59ffdf5e9b7713a202c2a5/merged
10.201.9.134:/storage 57G 53G 4.7G 92% /usr/share/nginx/html将node1设置成standby之后,在node2中使用
df -h可以看到共享存储的可以正常挂载,页面访问也是正常的